Claim your booking link
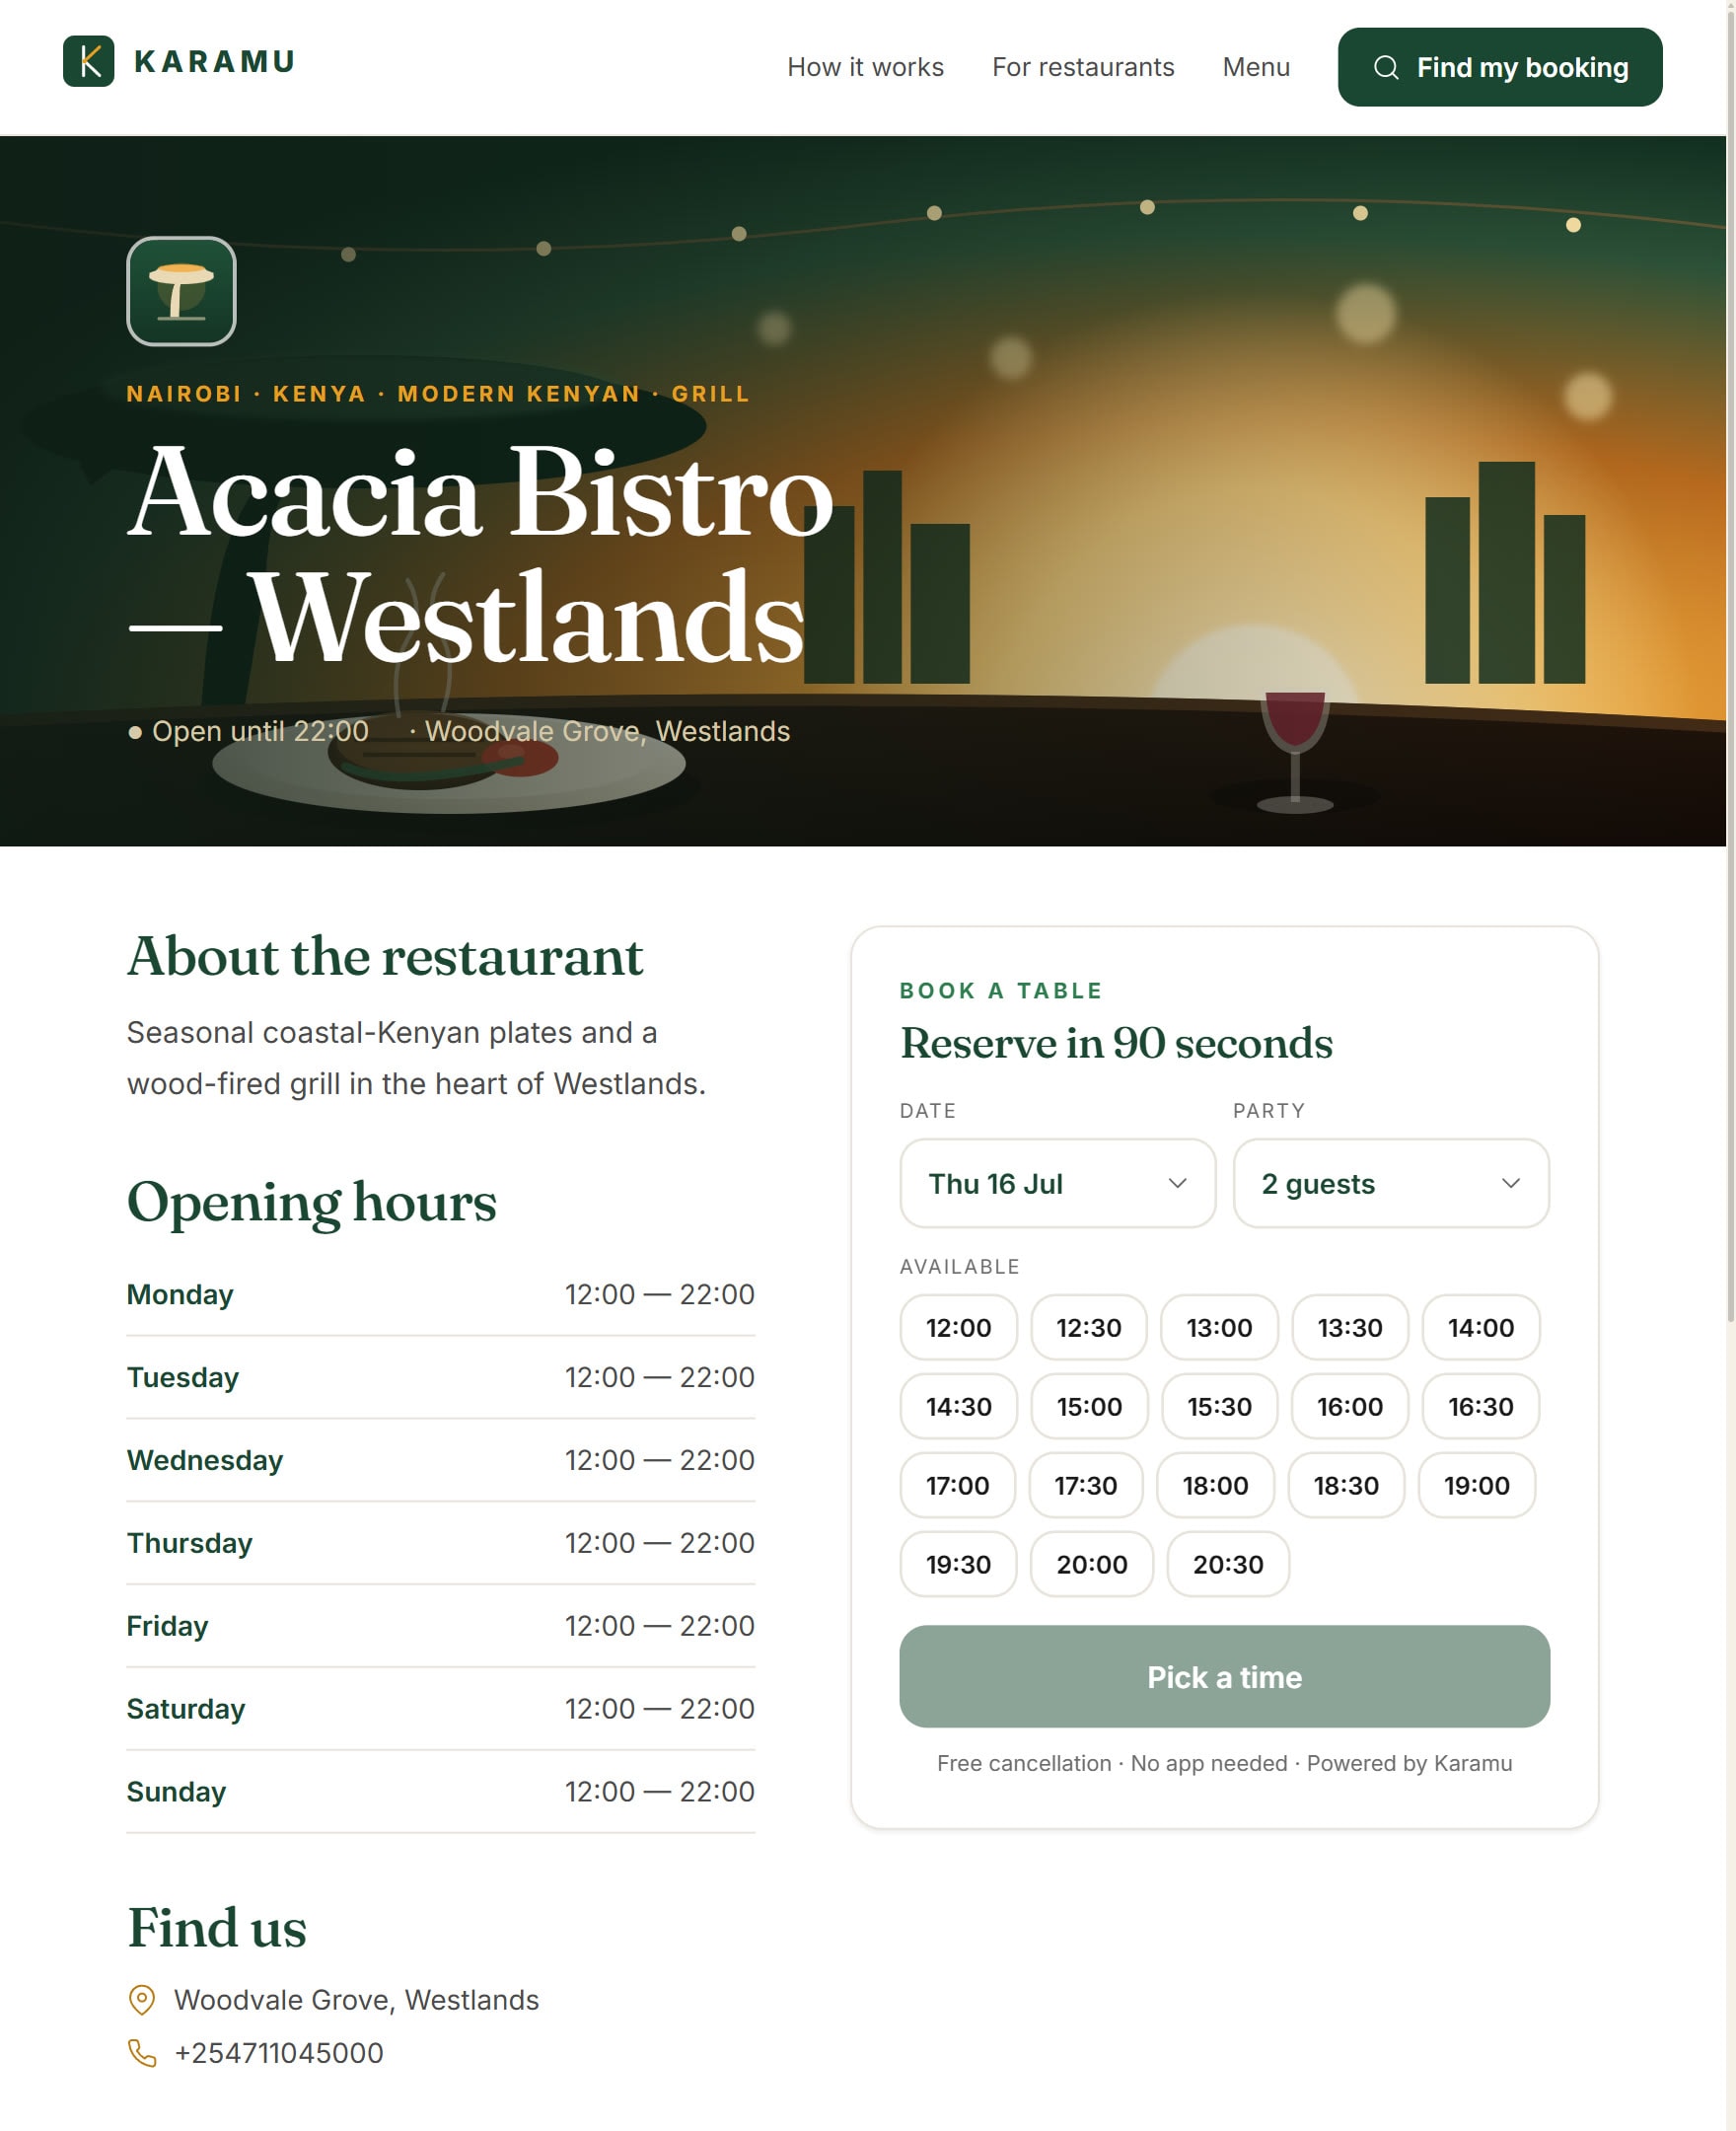
Every Karamu restaurant gets a public booking page at getkaramu.com/book/your-restaurant — that one link is what you’ll share on WhatsApp, Instagram and Google, and it’s where guests see your live availability and book themselves in.
In the dashboard, open Settings → General. Check your restaurant name (it’s the headline of your page), then set the Booking URL — the short name at the end of the link. Keep it close to how guests already say your name: short, lowercase, no year numbers. The hint under the field shows the live address as you type. Hit Save and the link is yours.
- Open Settings → General
- Check your restaurant name — it’s your page’s headline
- Set the Booking URL and save
Founder tip: Pick the link once and keep it. Changing it later breaks QR codes you’ve already printed and links you’ve already shared — the dashboard will ask you to confirm before it lets you.
Add your cover photo, cuisine & hours
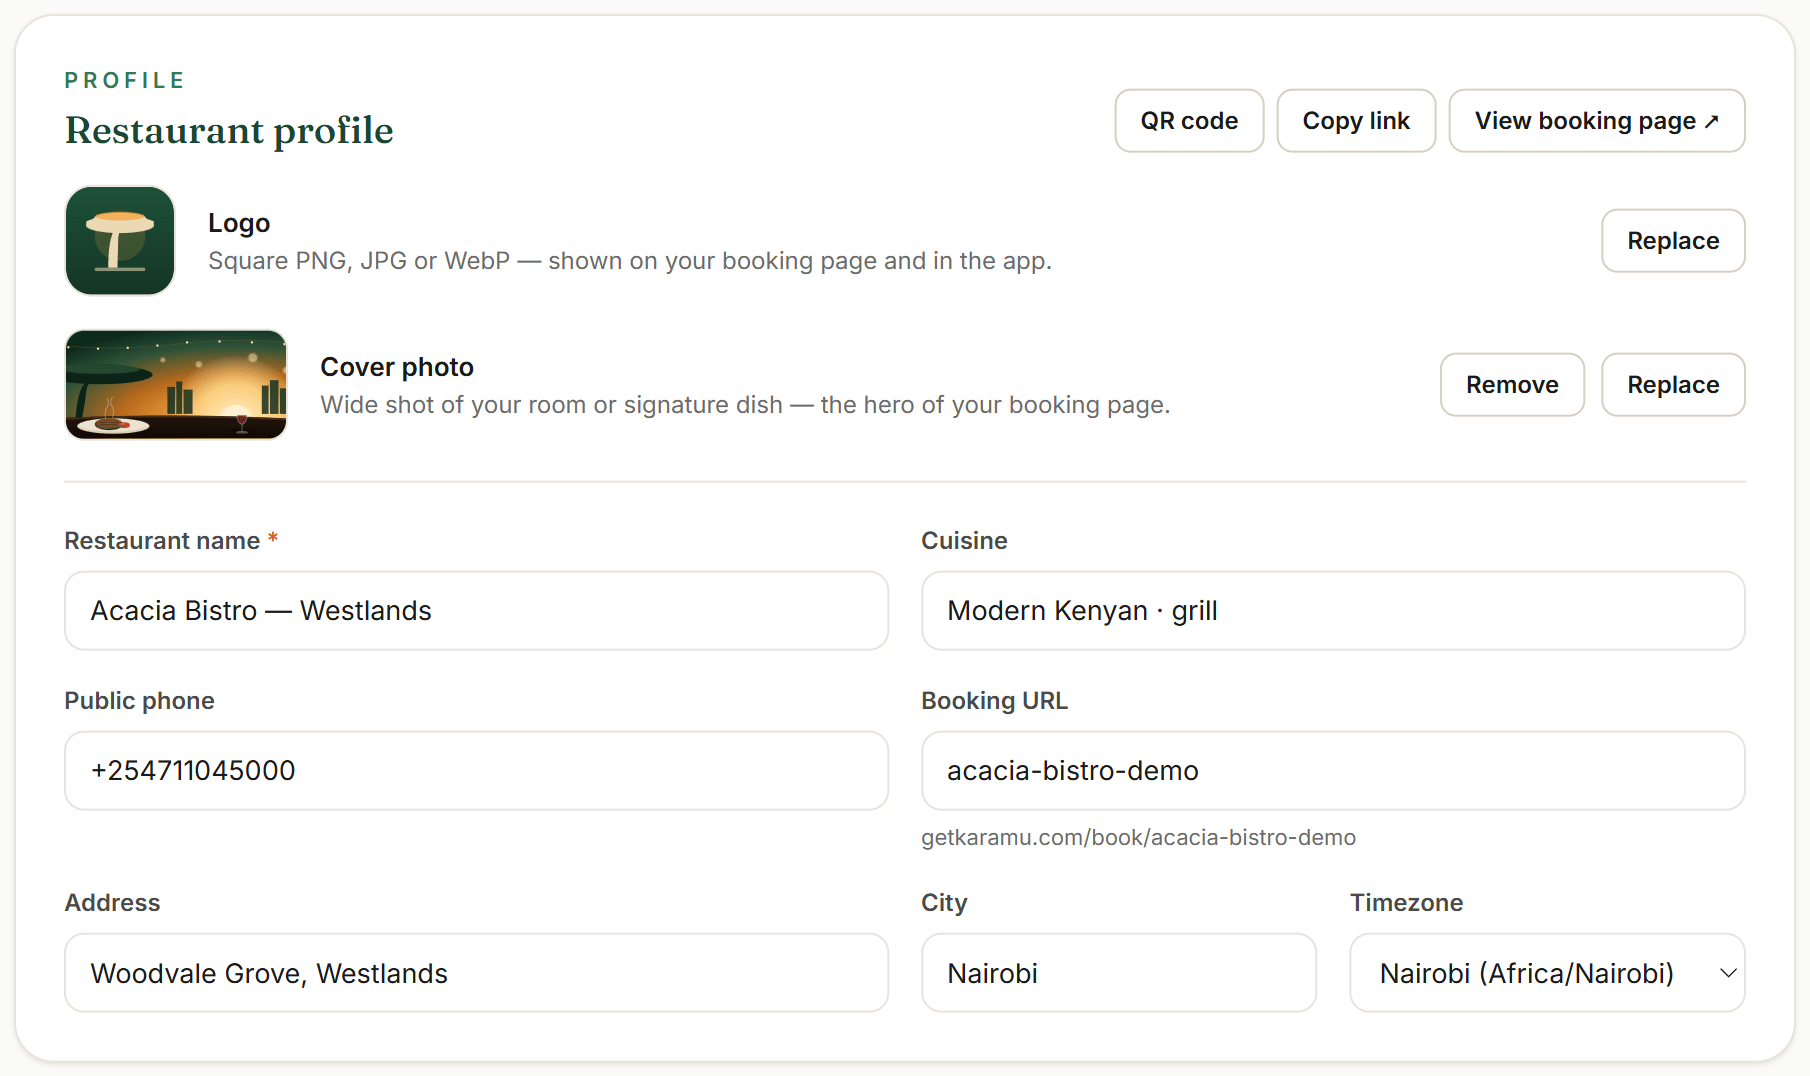
Still in Settings → General: upload a cover photo — a wide shot of your room or a signature dish; it’s the hero image at the top of your booking page — and your logo (square PNG, JPG or WebP). Both save the moment they upload. Then fill in Cuisine, your public phone and your address — they show on your page and on your card in the Karamu restaurant directory.
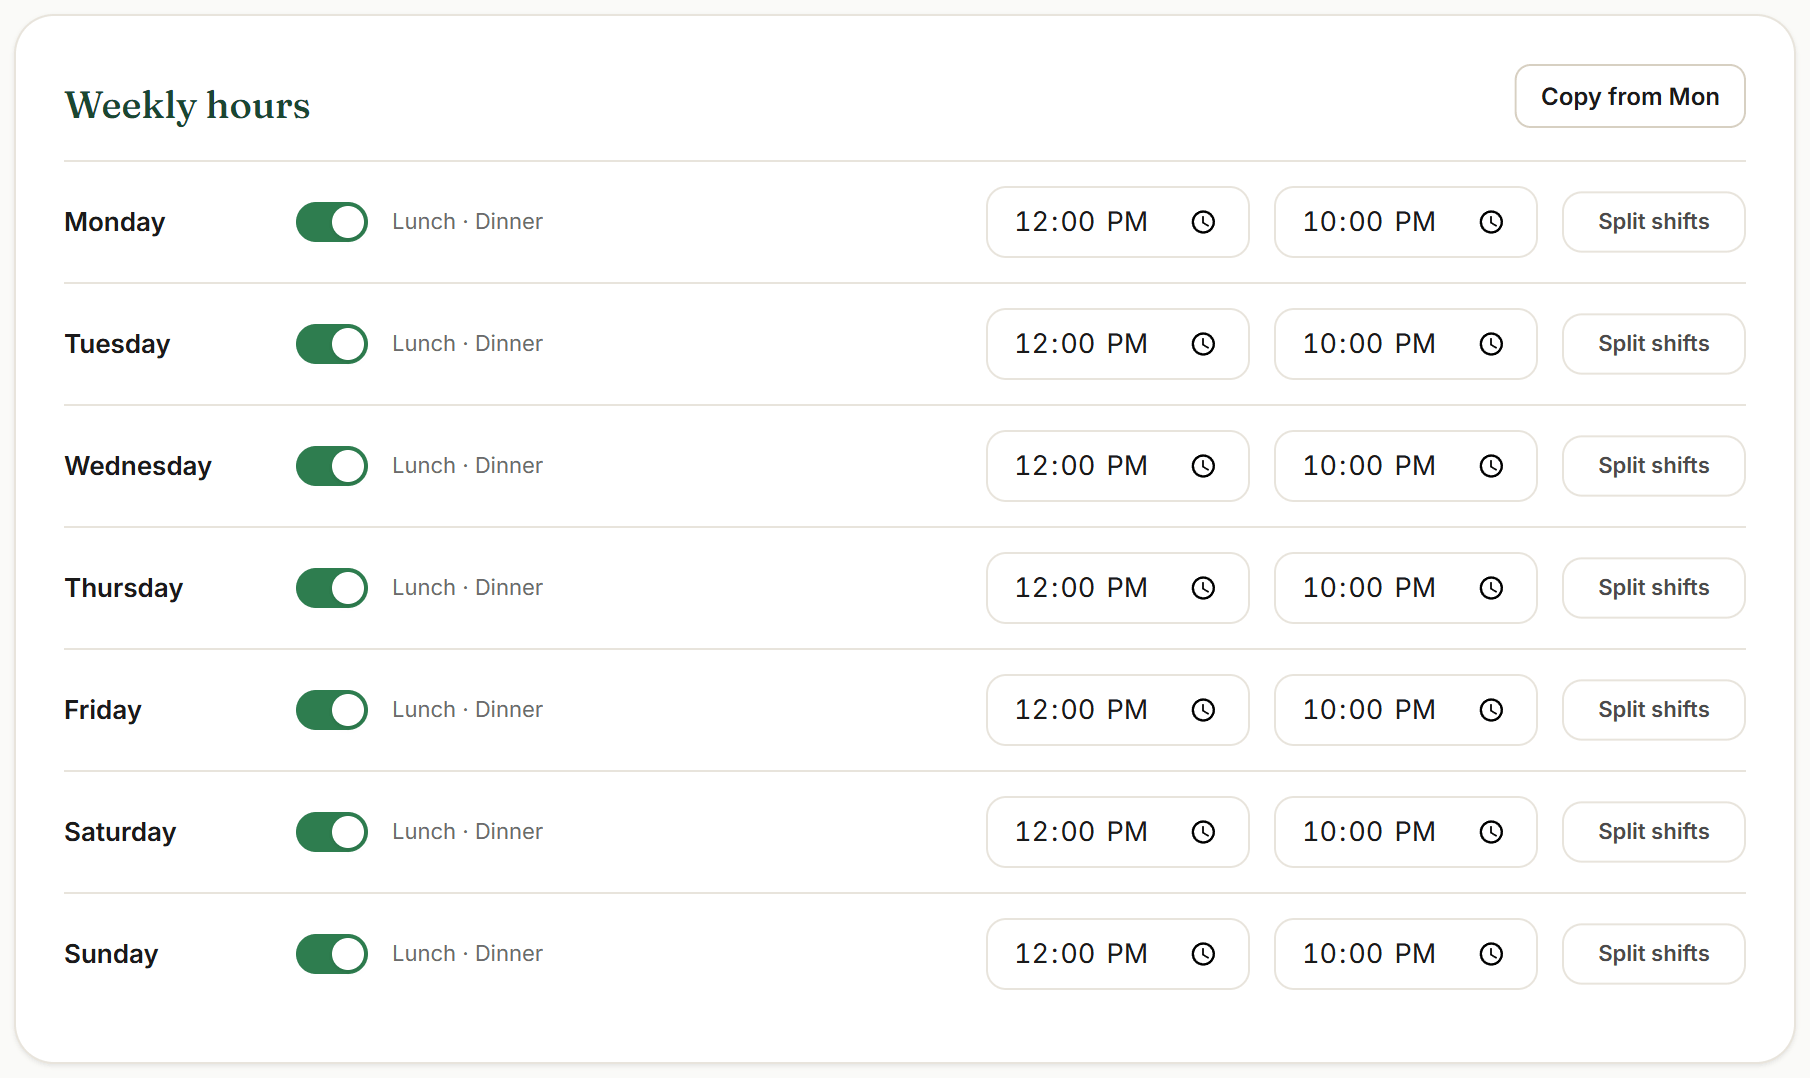
Next, Settings → Hours & service. Switch on each day you open and set the times — if you run lunch and dinner as separate services, Split shifts gives that day a second service. Set Monday first and use Copy from Mon to fill the week in one click. Guests can only book inside these hours, so this is what keeps 3 a.m. bookings from ever reaching you.
The same page handles closures & holidays — add a date and you’re closed for it, or give it modified hours for the day. Add your next public holiday now so it’s handled before anyone books it.
- Upload a cover photo and logo — they save immediately
- Fill in Cuisine, phone and address
- Set weekly hours in Settings → Hours & service
- Add your next holiday under closures
Set your booking rules & deposits
Settings → Booking rules is where your page learns how your floor actually runs. Table time is how long a party holds a table, slot interval is the gap between bookable times, and the buffer is your reset time between seatings. Max covers per slot caps how many guests can book into the same time — set it to what your kitchen can take at once, not what your room can seat.
Under “Who can book, and when”, set the largest party that can book online (bigger groups call you — you take those directly), how far ahead guests can book, and the minimum notice you need. Leave auto-confirm on to confirm bookings instantly; switch it off if you’d rather approve each one from the dashboard first.
Then deposits. Switch on “Require a deposit” and choose how it’s charged — per guest (scales with the party) or one flat amount per booking — plus the days it applies: most pilots start with Friday and Saturday only. Set your free cancellation window, and guests pay by M-Pesa or card as they book — the booking only confirms once the deposit clears. Deposits switch on once your payout account is verified, which is its own five-minute setup: Connect M-Pesa.
- Set table time, slot interval and buffer to match your real turns
- Cap the largest online party — bigger groups call you
- Switch on “Require a deposit” and pick your deposit days
- Set your free cancellation window
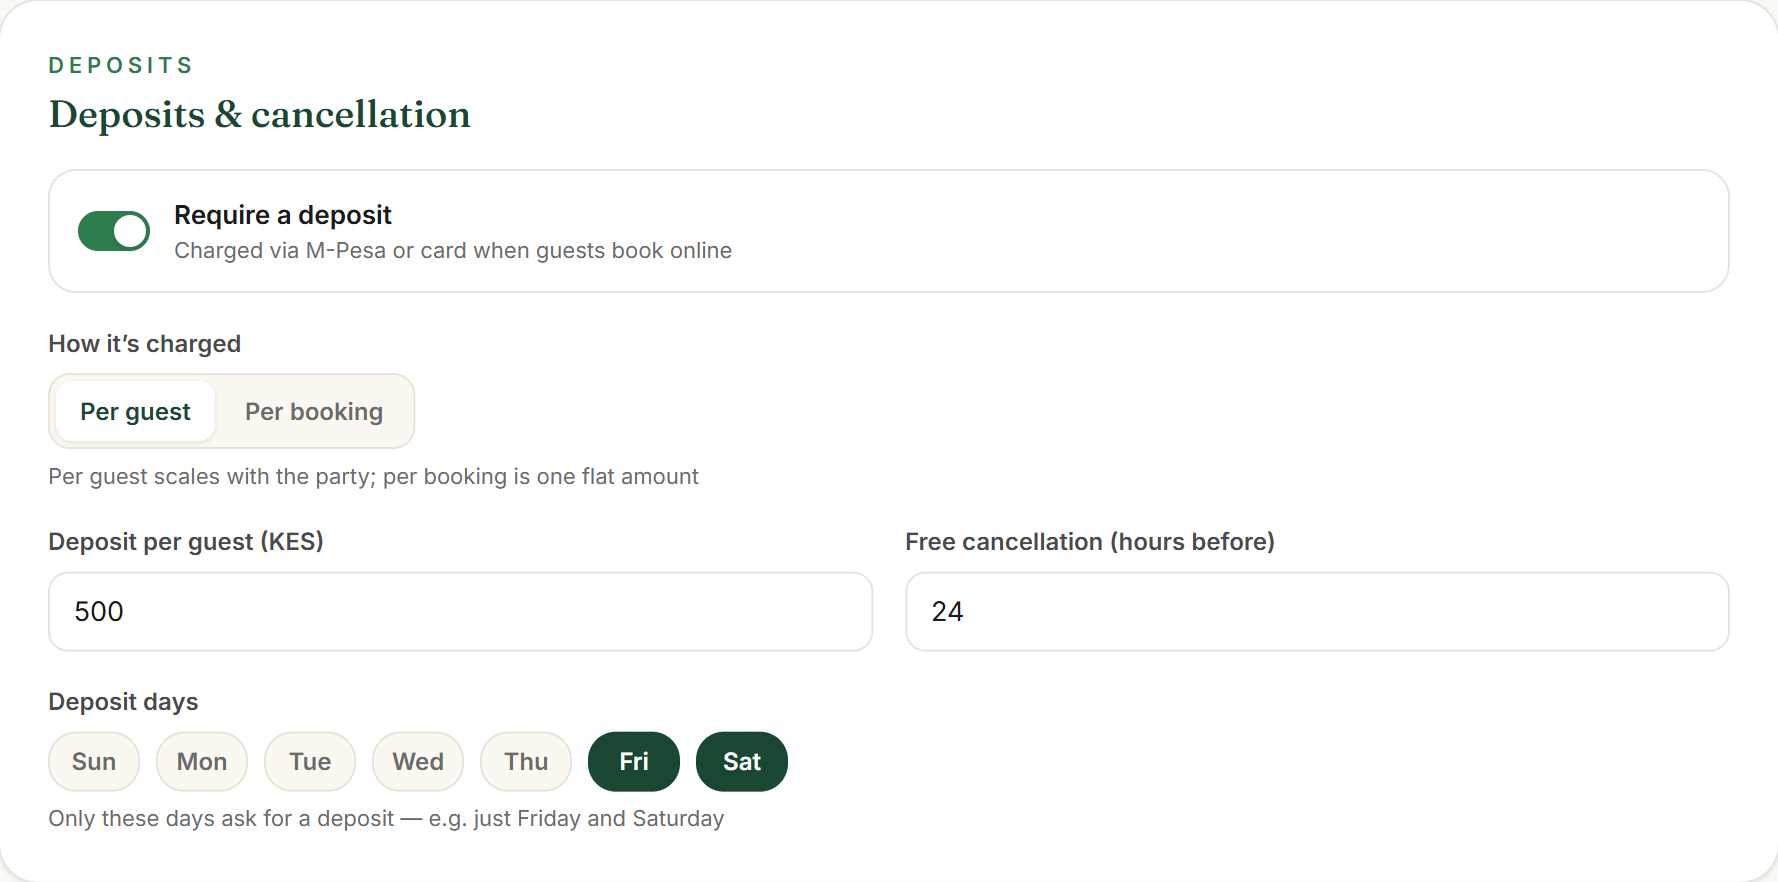
Founder tip: Start deposits on your two busiest nights only. It cuts no-shows where they cost you most, and midweek guests keep booking with zero friction — you can widen it any time.
Share it everywhere guests find you
Your page is live the moment it’s saved — now put the link where guests already are. Back in Settings → General, the Copy link button grabs your address, and QR code gives you a print-ready code for the same page — tape it to the door, drop it on menus and flyers.
The three places that matter most in Nairobi: your WhatsApp — answer “do you have a table?” with the link, and put it in your WhatsApp Business profile; your Instagram bio — one tap from your food to a booked table; and your Google Business Profile — add it as your reservations link under “Bookings”, so guests who find you on Maps can book without calling.
From then on, every booking that comes through the link lands straight on your floor plan, and guests get an email confirmation with their manage link the moment they book. WhatsApp and SMS confirmations switch on once your message templates are approved — WhatsApp & SMS covers that setup.
- Copy link from Settings → General
- Put it in your WhatsApp Business profile and Instagram bio
- Add it to your Google Business Profile as the reservations link
- Print the QR code for the door and menus