
Connect your payout account
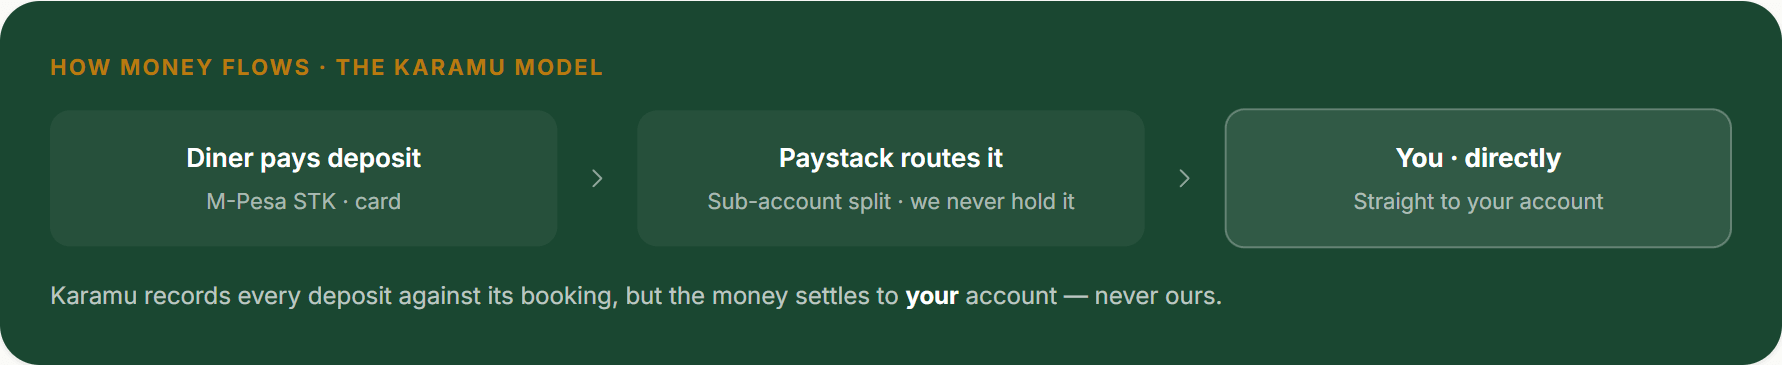
Deposits on Karamu never sit in a Karamu wallet. A guest pays by M-Pesa or card through Paystack, Paystack routes it through your own sub-account, and the money lands directly in your account — Karamu records every deposit against its booking, but never holds it. The M-Pesa & payments page draws this out under “How money flows · the Karamu model”.
Open Settings → M-Pesa & payments. The one-time form, “Where should deposits settle?”, asks for three things: your Registered business name, where to Settle to (an M-Pesa wallet — those options are tagged “· wallet” — or a bank account), and the Wallet number or Account number (digits only). Press Connect payout account and Karamu creates your own Paystack sub-account. Only an owner can connect payouts.
It doesn’t go live the instant you submit. The status reads “Being verified” while Karamu and the payment provider check the account out — this is not a button you press yourself. When it clears, the status flips to “Connected · live” and deposits switch on automatically; nothing else is needed from you. To change where money settles later, you contact support — a deliberate two-person step once real money is flowing.
- Open Settings → M-Pesa & payments
- Fill “Where should deposits settle?” and press Connect payout account
- Wait for the status to move from Being verified to Connected · live
Founder tip: Start verification on your kickoff call. It runs in the background and switches deposits on the moment it’s approved, so there’s nothing to sit and wait for — and no button you have to remember to press.
Set your deposit amounts
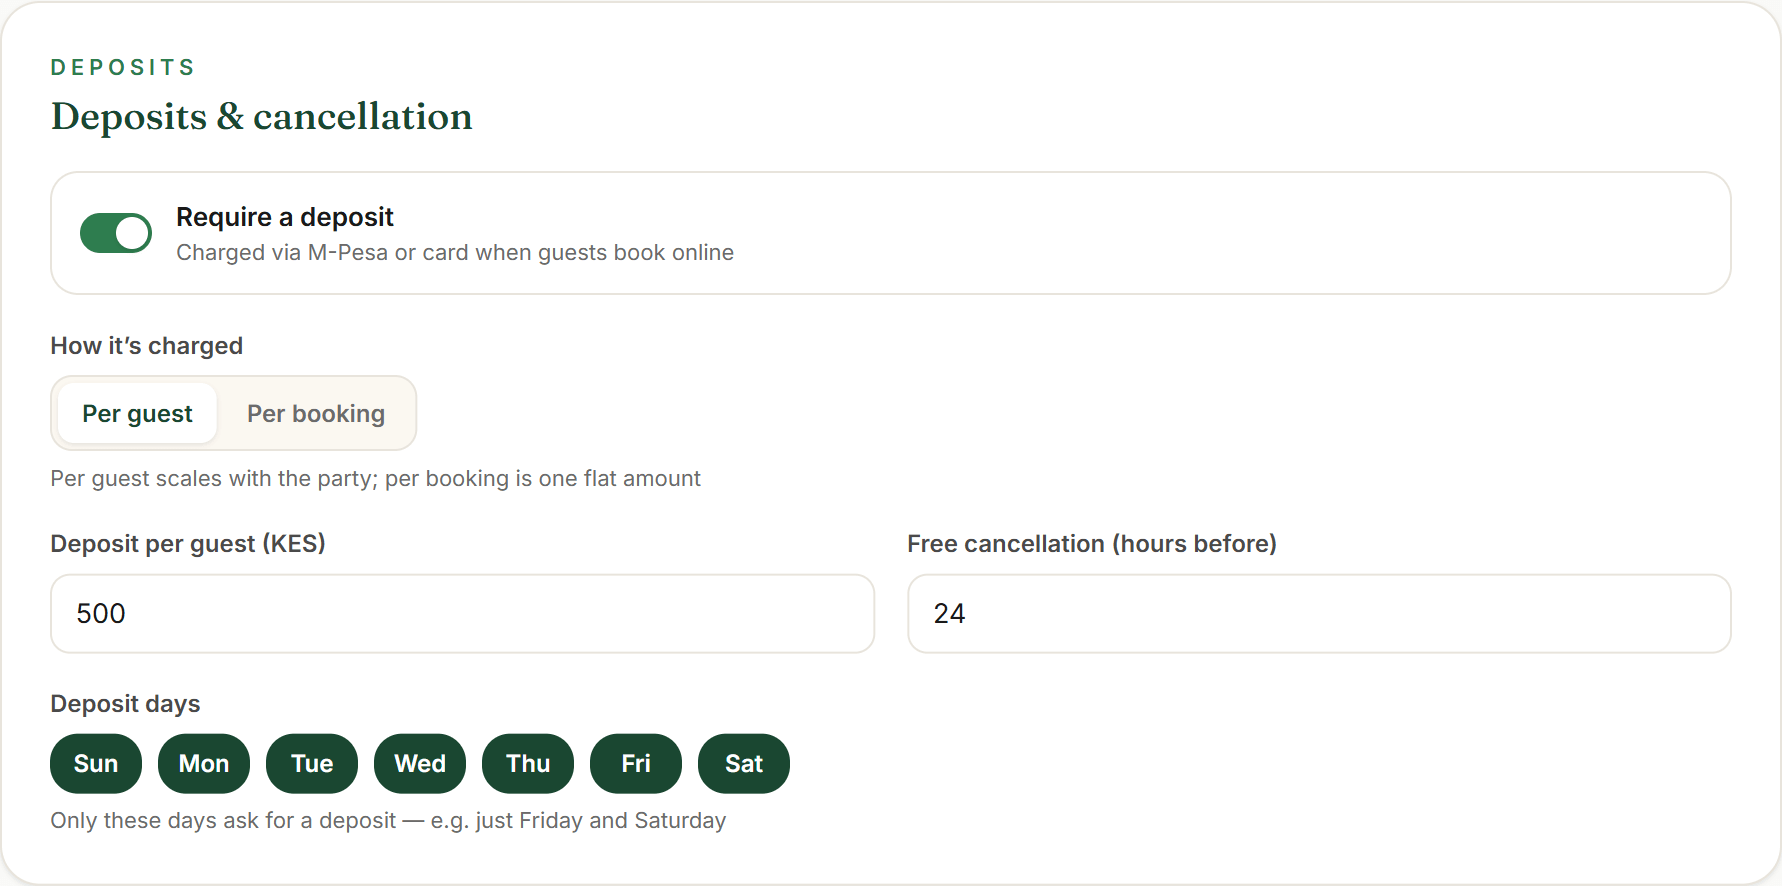
With payouts verified, deposits are yours to switch on. Open Settings → Booking rules and find the “Deposits & cancellation” card. The “Require a deposit” toggle stays locked until your payout account is verified — the card says so plainly — so this step follows the one above, never the other way round.
Switch it on and choose how it’s charged. “How it’s charged” is a choice between Per guest (the deposit scales with the party) and Per booking (one flat amount), with the figure in whole shillings under Deposit per guest (KES) or Deposit per booking (KES). Set your Free cancellation (hours before) window, then pick your Deposit days — the Sun–Sat toggles let you ask for a deposit on just your busiest nights, e.g. Friday and Saturday. Press Save changes in the footer bar.
These are the same deposit rules your booking page reads — Set up your booking page covers them from the booking-rules side.
- Open Settings → Booking rules → “Deposits & cancellation”
- Switch on Require a deposit (unlocks once payouts are verified)
- Choose Per guest or Per booking and set the amount
- Pick your Deposit days and press Save changes
Founder tip: Per-guest keeps the deposit fair for a table of two and meaningful for a table of ten. Most pilots start there and only reach for a flat per-booking amount on set menus or private hire.
Send yourself a test prompt
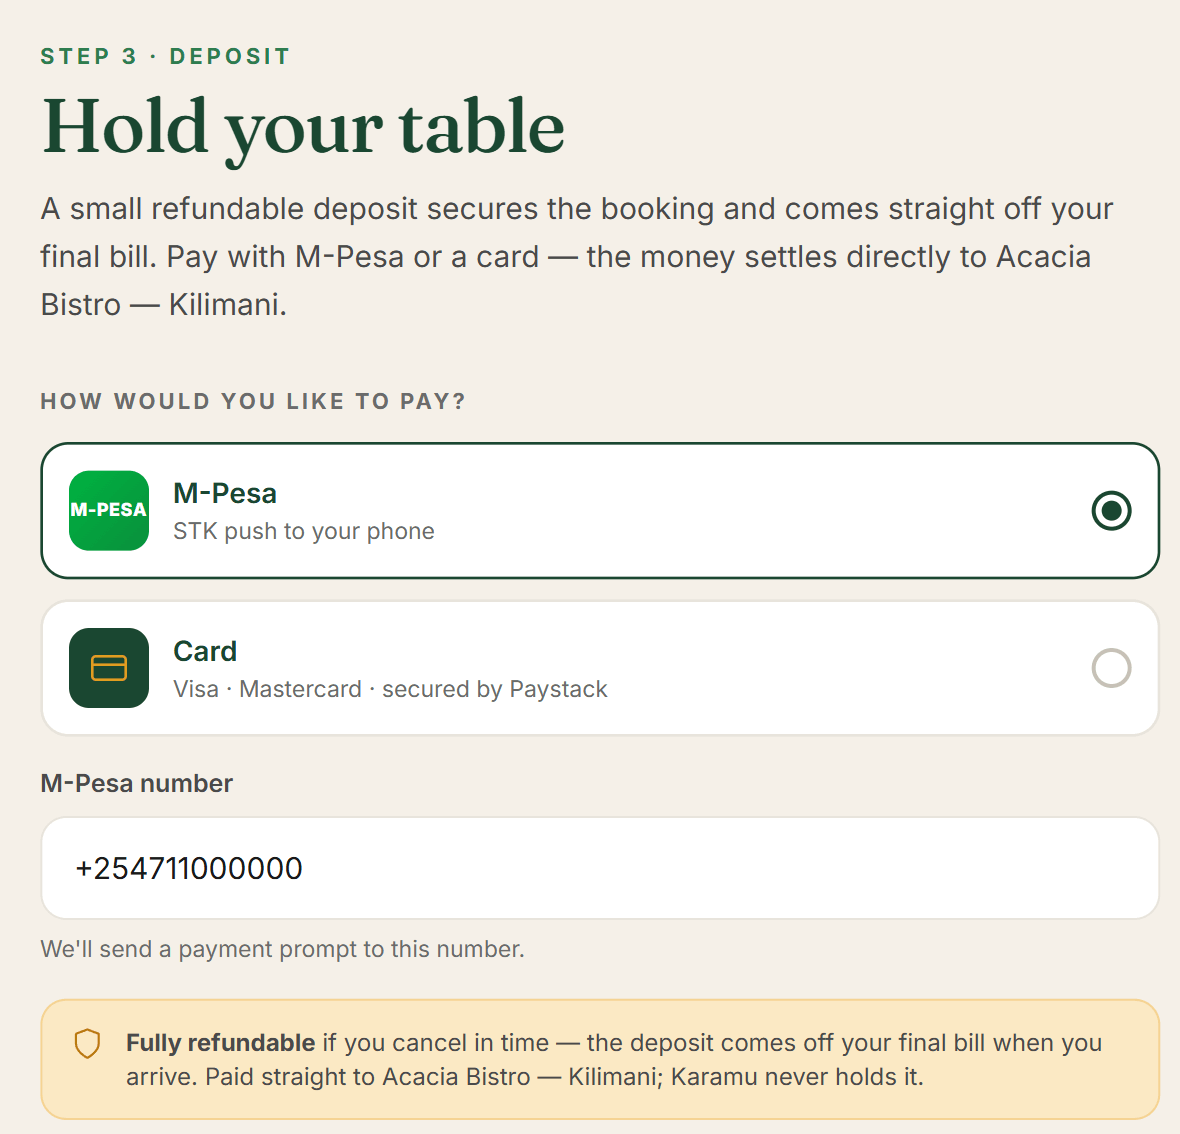
There’s no “test payment” button in the dashboard, and that’s deliberate — the honest test is the real thing. Open your own booking page, book a table on one of your deposit days, and pay the deposit yourself at the last step, “Hold your table”.
That step asks “How would you like to pay?” and offers two real options. M-Pesa (“STK push to your phone”) takes your M-Pesa number and, on Send M-Pesa prompt, pushes a genuine prompt to that phone — enter your PIN and it clears. Card (“Visa · Mastercard · secured by Paystack”) hands off to Paystack’s hosted checkout. Both settle through the same sub-account, straight to you.
The booking only confirms once the payment provider confirms the money — not the moment your phone shows success. If the prompt doesn’t arrive, the screen offers “Didn’t get the prompt? Resend”. The banner is the promise your guests read: “Fully refundable” if they cancel in time, and the deposit comes off their final bill when they arrive — paid straight to you, Karamu never holds it.
- Open your own booking page and book on a deposit day
- At “Hold your table”, pay the deposit yourself
- Try M-Pesa (STK push) or Card (via Paystack)
- Watch it appear in Payments
Founder tip: Run this on your kickoff call with a founder watching, using your own phone number. You’ll see the exact prompt your guests get — and you can cancel to get your test deposit back.
Track every deposit
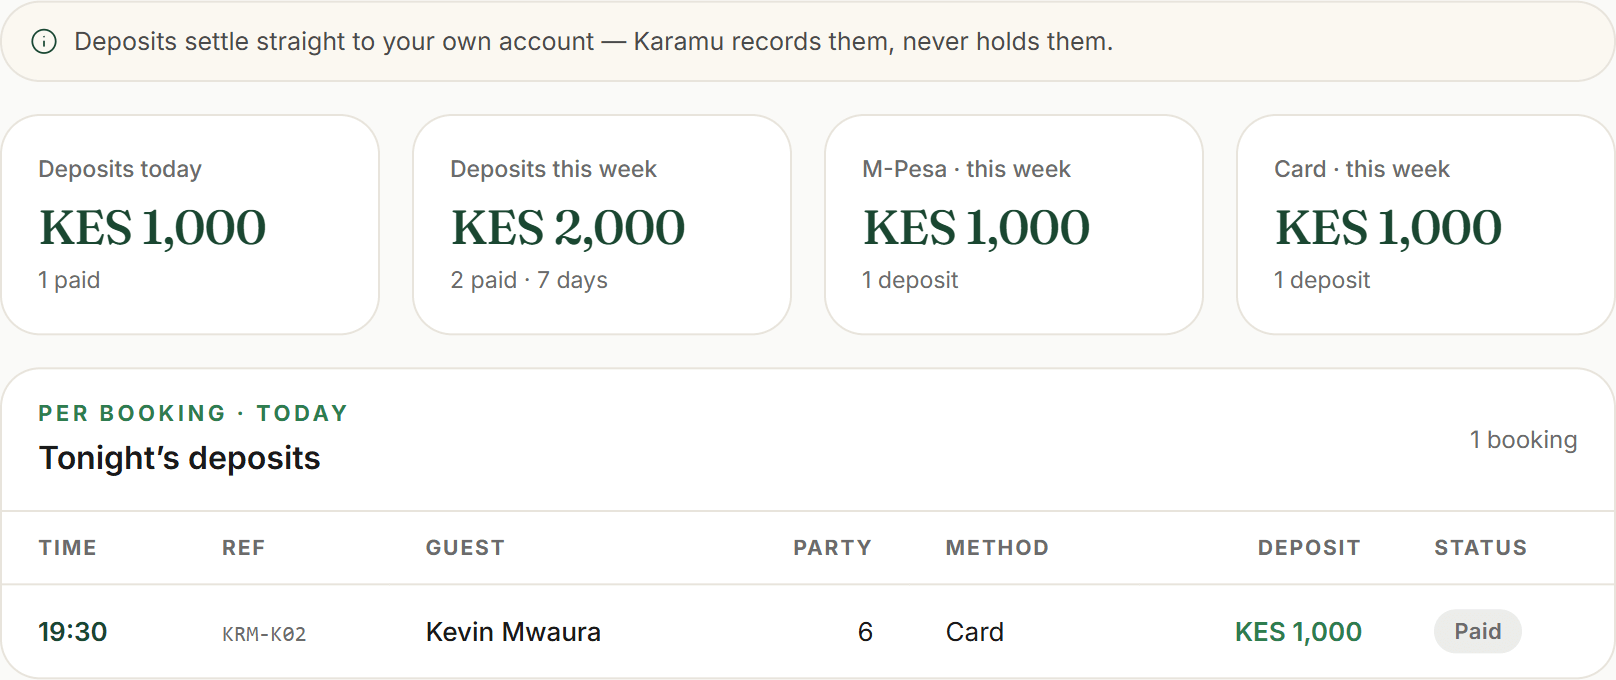
Every deposit a guest pays shows up in Payments (“Deposits collected through Karamu”). The Deposits tab totals what settled today and this week, splits it by method, and lists each of tonight’s bookings a row at a time — time, guest, party, method, amount and status. A banner keeps the model in plain sight: “Deposits settle straight to your own account — Karamu records them, never holds them.”
That’s the whole loop: a guest books, pays a deposit by M-Pesa or card via Paystack, the money lands in your account, and the booking drops onto your floor plan — with its deposit recorded here in Payments. To change where deposits settle you contact support; everything else you run yourself from these two settings pages.
- Open Payments → Deposits to see today and this week
- Read each booking’s method, amount and status in Tonight’s deposits
- Use No-shows & refunds to see how each deposit was reconciled
Founder tip: The No-shows & refunds tab is your record of what happened to a deposit when a table didn’t show — retained, refunded, or a refund in progress. It’s read-only here; a Karamu admin actions any refund, so the figure you see always matches the money.