
Sketch your room
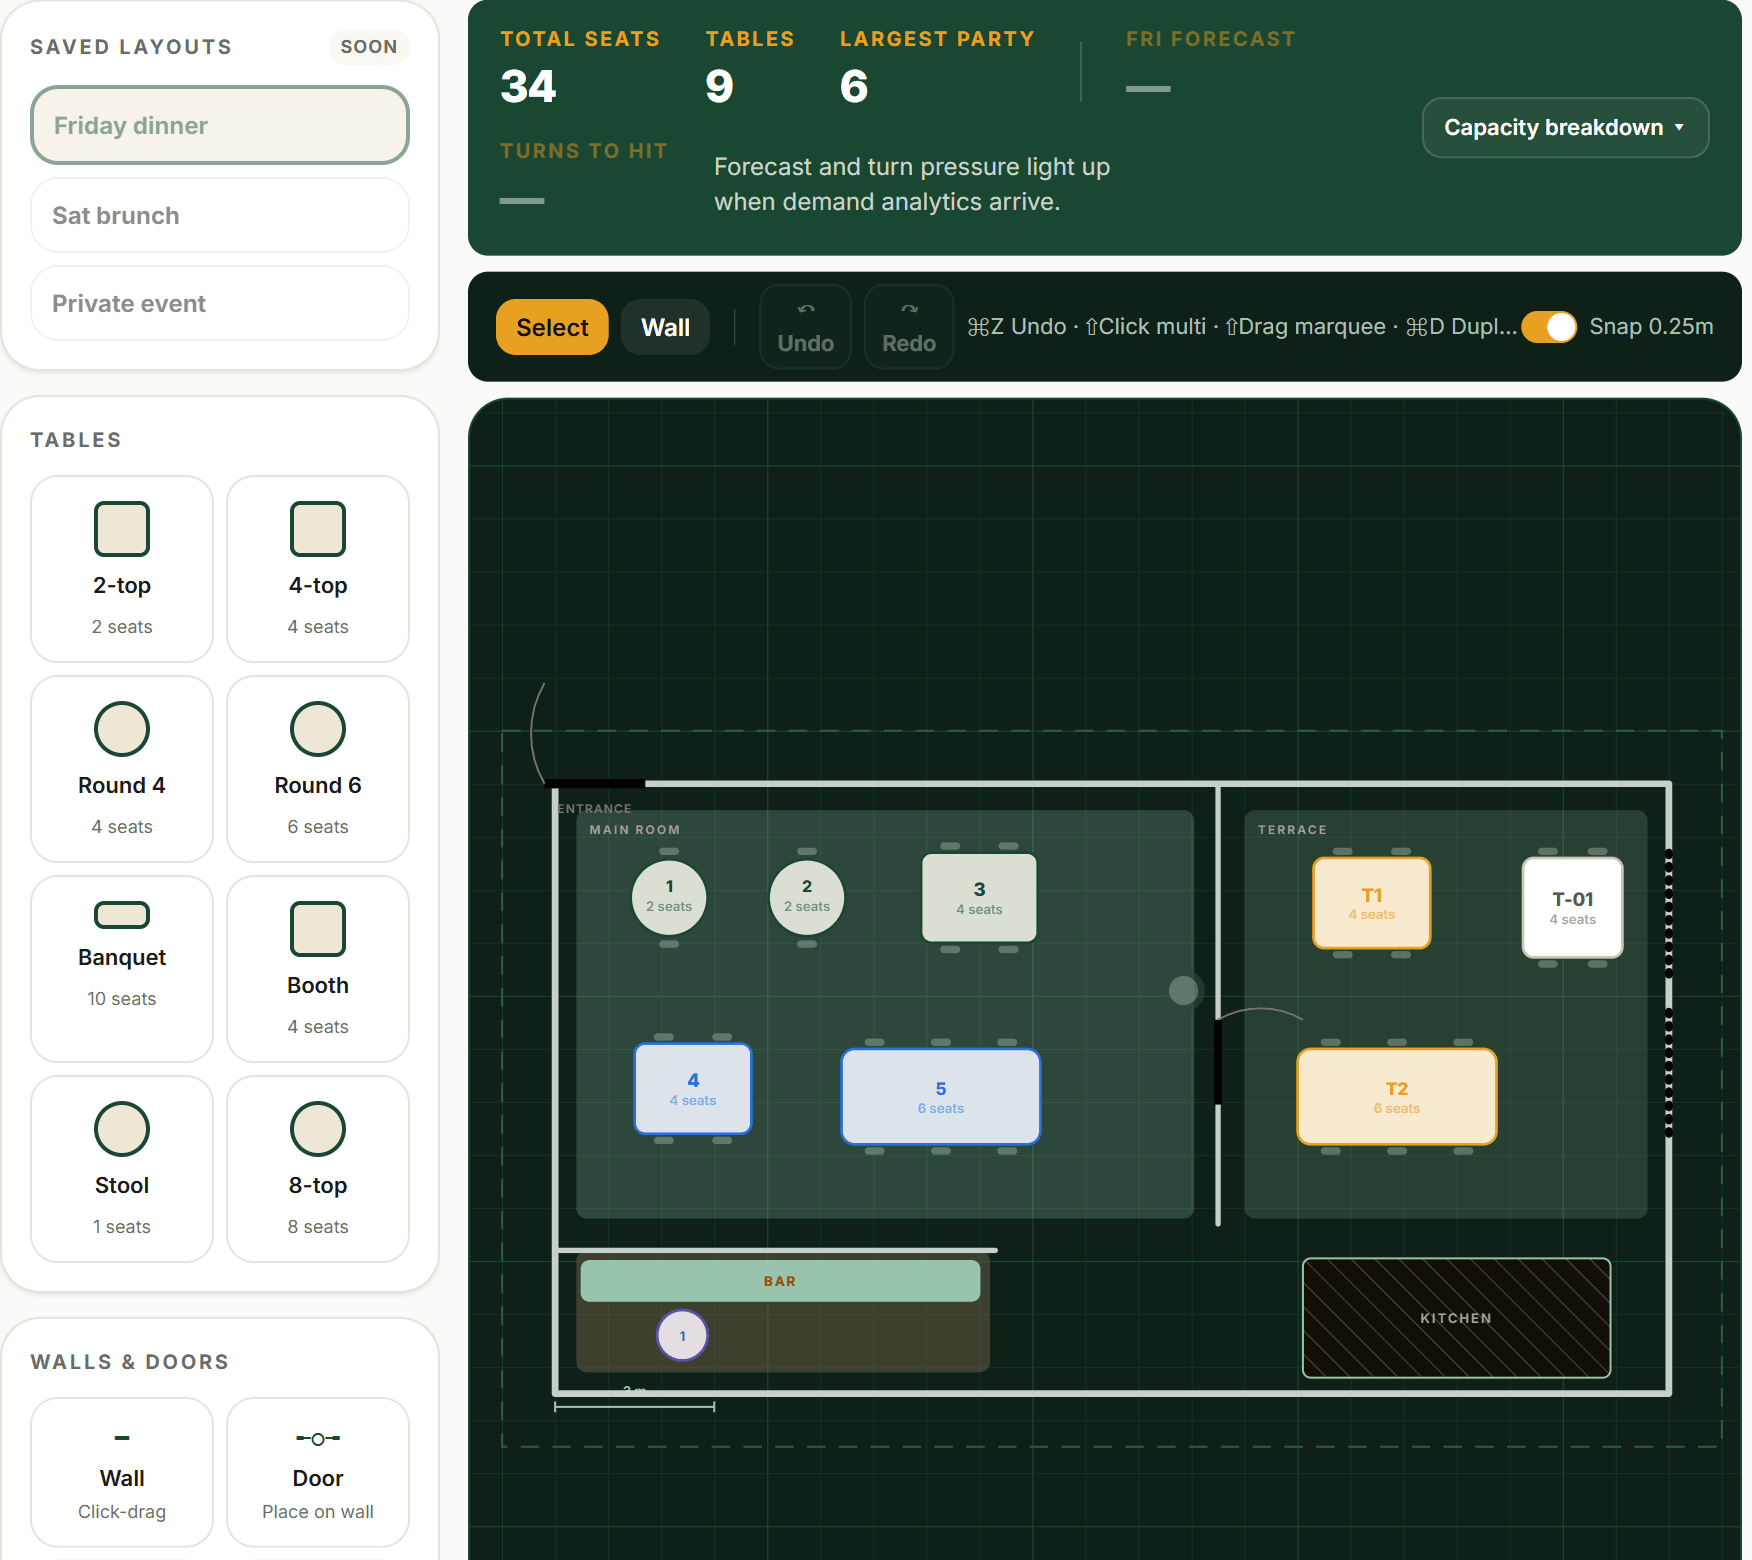
Open Floor plan from the sidebar and press Edit layout, then open a floor to reach its editor. The subtitle sets the rules of the room: “Drag to reposition · click to edit · changes stay in your draft until you publish”. Nothing you do here touches tonight’s service until you publish it.
The left palette is your kit. Walls & doors holds Wall, Door, Window and Room for the shell of the space. Zones tint areas of the floor and group tables for booking preferences — press “+ Draw zone” to add one (Window, Terrace, Bar). As you work, the green capacity ribbon at the top keeps a live count of Total seats, Tables and Largest party.
- Open Floor plan → Edit layout and pick a floor
- Lay out the shell with Walls & doors
- Add zones with “+ Draw zone” (Window, Terrace, Bar)
Founder tip: Everything in the editor is a draft, and drafts autosave — so build in passes across a few sittings. The live floor your team runs on doesn’t change until you press Publish layout.
Place & size your tables
The Tables group in the palette holds presets — 2-top, 4-top, Round 4, Round 6, Banquet, Booth, Stool, 8-top. Click one to drop it in, or drag it straight onto the floor, then position it where it really sits in the room.
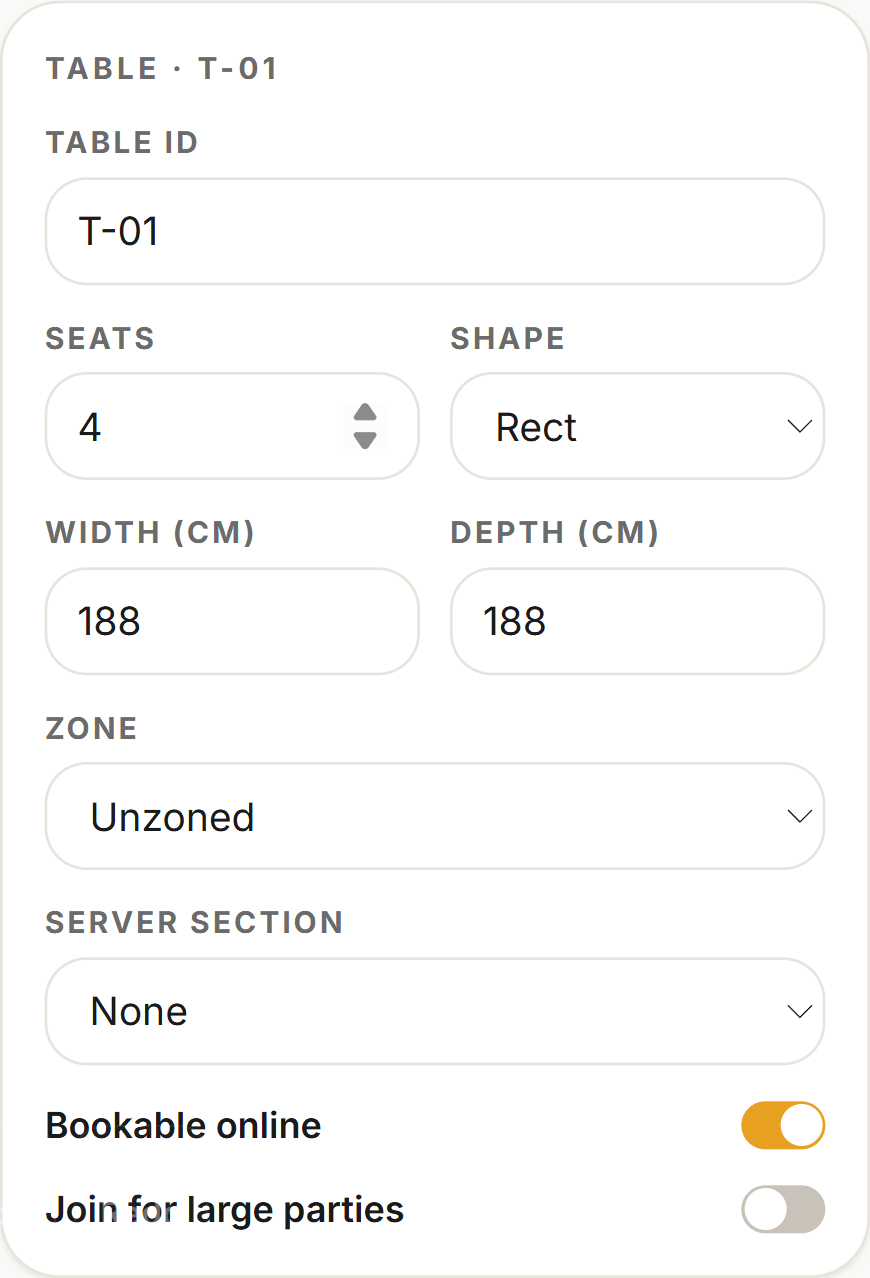
Click a table to open its panel and make it match the real one. Give it a Table ID your team will recognise, set its Seats and Shape, and dial in the true Width (cm) and Depth (cm) so the layout is to scale. Assign it a Zone, and use the Bookable online switch to decide whether guests can be seated there — online bookings only ever land on tables you’ve flagged bookable.
Which tables are bookable is what your booking page offers guests — Set up your booking page covers the booking side.
- Add tables from the Tables palette and place them to match your room
- Set each table’s Seats, Shape and true Width/Depth
- Assign a Zone and set Bookable online
Founder tip: Set Width and Depth in real centimetres, not by eye. A to-scale floor is what keeps aisles honest — the editor flags spots that are too tight before you publish.
Set covers & combine rules
The capacity ribbon does the maths for you. Its live tally of Total seats, Tables and Largest party updates as you place tables, and “Capacity breakdown” opens the detail — your Seat mix, the split By zone, and how many of your seats are bookable online.
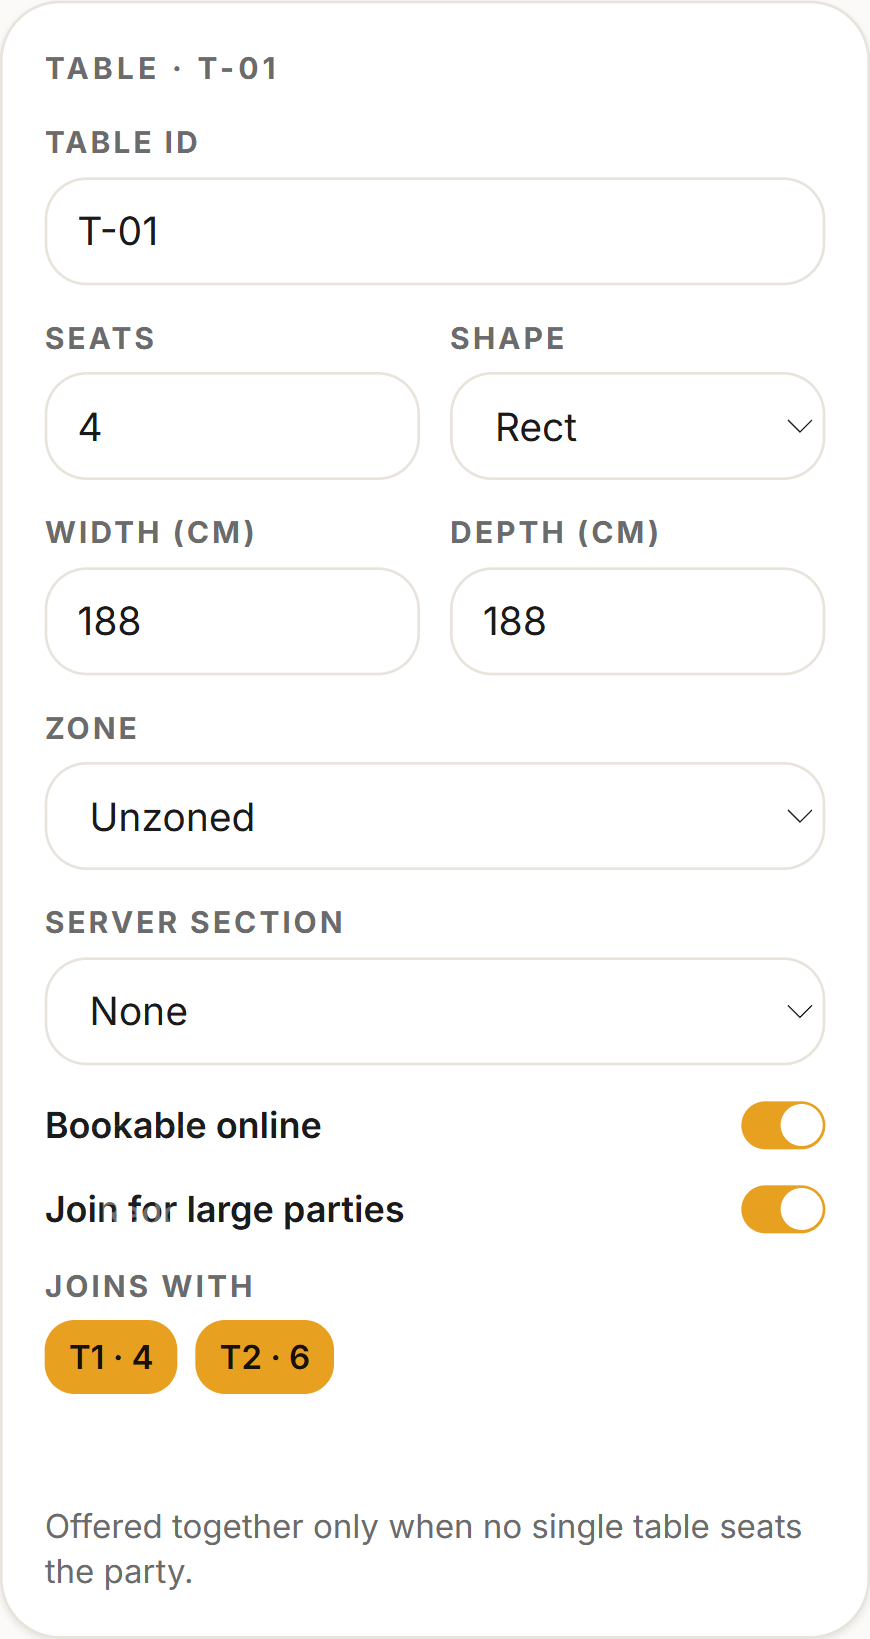
To seat groups bigger than any single table, switch on “Join for large parties” in a table’s panel and pick its neighbours under “Joins with”. As the panel notes, joined tables are “Offered together only when no single table seats the party” — it’s a rule you set ahead of time for the availability engine, not a merge you do at the table. When a booking comes in, Karamu auto-assigns it a table; your host can always change the table on the booking afterwards.
When the layout is right, press Publish layout. Publishing makes the draft your live floor — and it permanently deletes any table you dropped from the draft. The editor spells out exactly what it will add or remove and asks you to confirm first, so nothing disappears by surprise.
- Read Total seats, Largest party and Capacity breakdown in the ribbon
- Switch on Join for large parties and set its Joins with partners
- Press Publish layout and confirm the changes
Founder tip: Publishing is the only step that changes your live floor, so treat it as the commit. Drafts are free to experiment in; a publish is deliberate — and any table you removed from the draft is gone for good.
Print your table QR codes
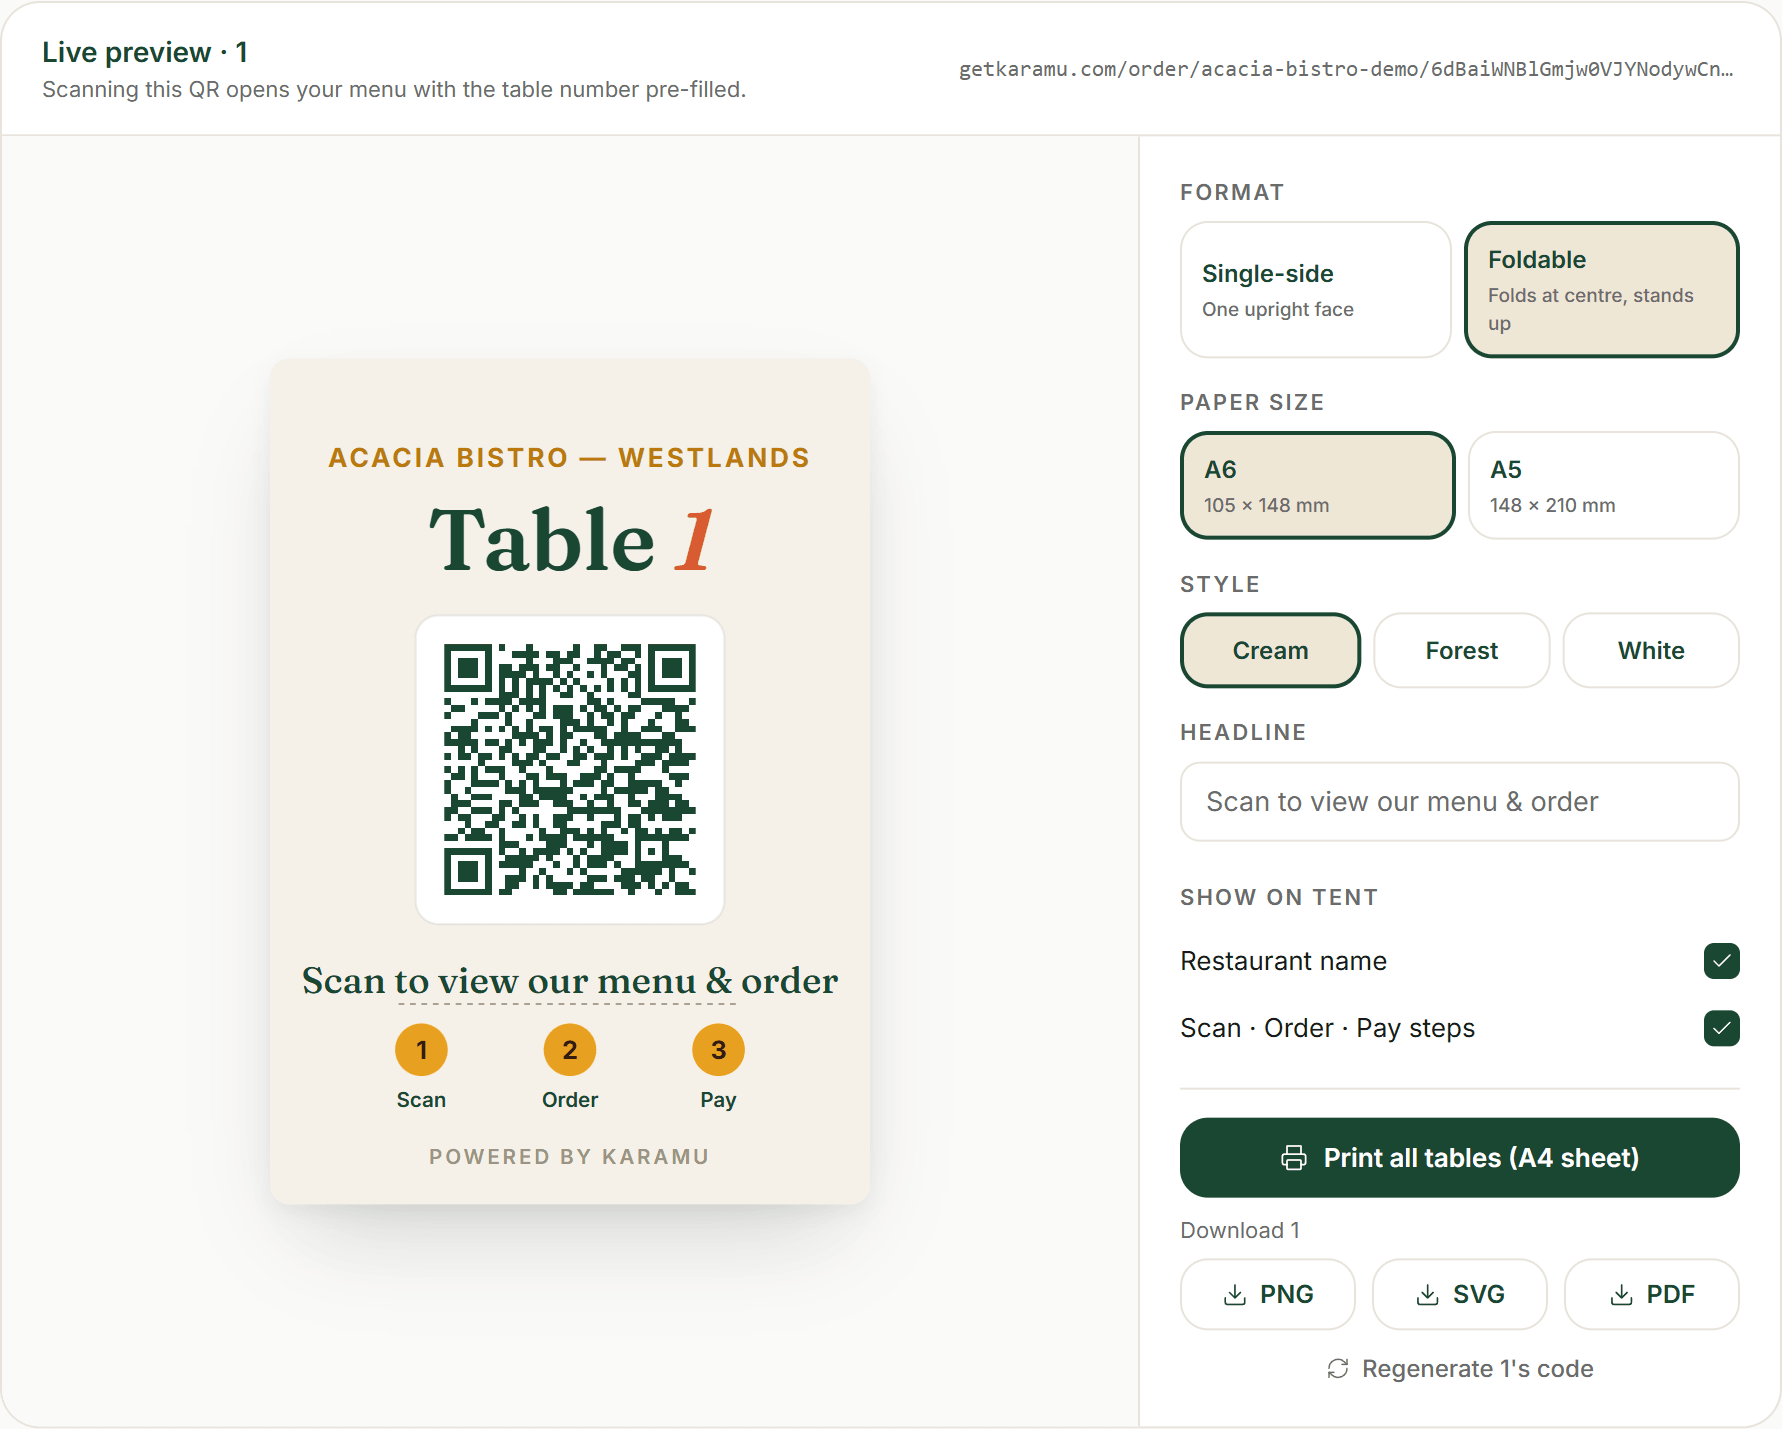
Each table can carry a QR ordering tent. Open Settings → Tables & zones (the page is headed “Tables & QR”) and press Generate codes to mint a code for any table that doesn’t have one — scanning it opens your menu with the table number already filled in.
The tent designer styles the printout: choose a Format (Single-side or Foldable), a Paper size (A6 or A5), a Style (Cream, Forest or White) and a Headline, with Show on tent toggles for your restaurant name and the Scan · Order · Pay steps. Then Print all tables (A4 sheet), or download any single tent as PNG, SVG or PDF. If you ever Regenerate a table’s code, its old tent stops working — reprint that one.
One thing to switch on first: QR ordering has to be enabled in Settings → General for a scanned code to open the menu. Until it is, the codes show a “not available” page — though you can print the tents now and have them ready.
- Open Settings → Tables & zones and press Generate codes
- Style the tent — Format, Paper size, Style, Headline
- Print all tables (A4 sheet), or download PNG / SVG / PDF
- Turn on QR ordering in Settings → General so the codes work
Founder tip: Printing the QR tents is what ships here — a printed map of the floor itself isn’t a feature yet. Print the tents, fold them, and stand one on each table.